One of the biggest fears that people have, when building their tiny home, is properly installing the plumbing. Whether they are afraid that they are going to flood their house or just have a small leak, most people will pay an exorbitant amount of money to have a plumber come out and take care of it. But you would be surprised how easy and safe plumbing can be. Here is what you need to know to take away your fears of tiny house plumbing.

Honey, I messed up the plumbing!
Tiny House Plumbing Isn’t Complex
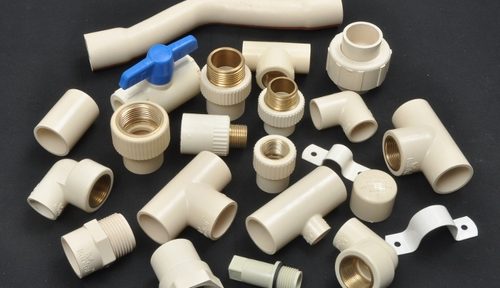
When you are plumbing your tiny home, there are different material options such as Pex, copper and CPVC. We recommend sticking with CVPC as we have found it to be the easiest to work with. When you are figuring out where you want your fixtures in your tiny house, simply mark it on the inside of your wall sheathing and start cutting. All the pieces can be dry fitted together so that you can plumb your entire house before committing to anything. Only after you are done will you need to cement everything. The good news is the cement for CVPC is colored, which makes it very easy to see if you have forgotten any joints after our dry fitting. CPVC cuts like a knife through butter with a pipe cutter and glues together with a two step cementing process. Water comes in, splits into the hot water heater and your cold water line, and then runs to all of the fixtures.
Tiny House Plumbing is Easy to Test and Fix
Once you get your pluming in, if you realize that you made a mistake and you need the sink a little further down, you can just simply snip the pipe, put a coupler in, and move it right to where you want it. To test, cap off all of your ends where your fixtures will be and pressurize the system with either air or by hooking it up to water. No leaks? Move on. If you do have any, now is the time to find them and fix them.
Tiny House Plumbing is Cheap

Even if your whole house was plumbed wrong and you had to tear it out and replace it, as long as you catch it early, you could do so on the cheap. CVPC is super cheap and you can probably re-purpose some of what you cut out. Just snip off the ends and get back at it!
Let's talk about Waste
So there are a lot of people who do not even know how the waster water leaves their large house, never mind a tiny one. There are a few different ways to handle this gray and black water. When we plumb our houses, we set them up like a big home, with gravity fed waste. This includes your gray water (this is from your shower and sink) and black water (this is your toilet waste) all in one drain. This is carried in 1.5" PVC pipe from your sink which dumps into a 2' and a a toilet waste pipe that comes from your shower in a 3" pipe. All of that comes together and 3slopes at 1/8" per foot toward the center of the house on the left side. this placement puts it at the normal location for RV waste hookups. The toilet and the shower drains have flanges that screw down and then connect to the fixture and your waste line. If you are not planning on access to a sewer/septic system then you need to go with a composting toilet to handle the black water and the gray water you can just run out into a French drain. Dan's book goes into more detail about installation of waste lines and how to drill through the sub-floor and install "P" traps.
Even Fixtures are Easy
Toilets require two bolts, a wax ring, and literally two nuts on the end of the water supply connector. Showers are plumbed inside the wall using threaded fittings. And sinks are connected with screw-on hoses. It is really easier than you imagine! One of my favorite parts of Dan's hands-on workshops is watching the students go from being scared of plumbing to literally making sculptures out of CPVC. Talk about a confidence booster! If you are looking for more on tiny house plumbing, you can check out the Tiny House Design & Construction Guide here. Have you conquered a plumbing project? If so, tell us about it in the comments!