Designing and building a solar power system for a tiny house can be a great way to power your home with clean, renewable energy, especially if you plan to be off the grid. However, it's important to carefully plan and design your system to ensure that it will meet your energy needs and be cost-effective.
Undertaking the task of designing and building a solar system can be daunting because initially it can appear to be very complicated. But this article is designed to take you step-by-step through the process so that you can have your system up and running for your tiny house in no time.
Choosing a System Type
There are a few different types of solar energy systems out there to choose from, each ranging in complexity, expandability, and cost.
Power Station
Power stations (sometimes called by the misleading name ‘solar generators’) are all-in-one systems that have most of the components (except the solar panels) in one product. This includes the batteries, charge controller, charger/inverter, and monitoring system. You’ll learn more about these individual components later in this article. Most of the wiring is done internally in the product, so you simply plug it in, and you are ready to go. As far as simplicity goes, it doesn’t get much easier than this.
The downsides, however, are significant. By having all the components packaged together, you are extremely limited when it comes to upgrading or replacing anything if it ends up being too small for your needs, or if a component fails. While this downside applies to most power stations, there are a select few that can be more easily fixed or upgraded.
These units can also be harder to incorporate into your house since they are generally designed for portability and not to be mounted. With the individual components found in the other system types, you can spread them out and fit them in tighter areas, as opposed to having to deal with one large box.
Lastly, most power stations are too small for true off-grid living. They are mostly designed for portability where you might need a little bit of extra power, perhaps over a few days, and not a true off-grid system. But as the popularity of power stations has grown, companies have been coming out with much larger units. One of these larger units that is also maintainable/repairable/upgradable is the Renogy Lycan 5000. So, if you don’t mind the solar system being external to your house (and don’t plan to move much), this could be a good option for you.
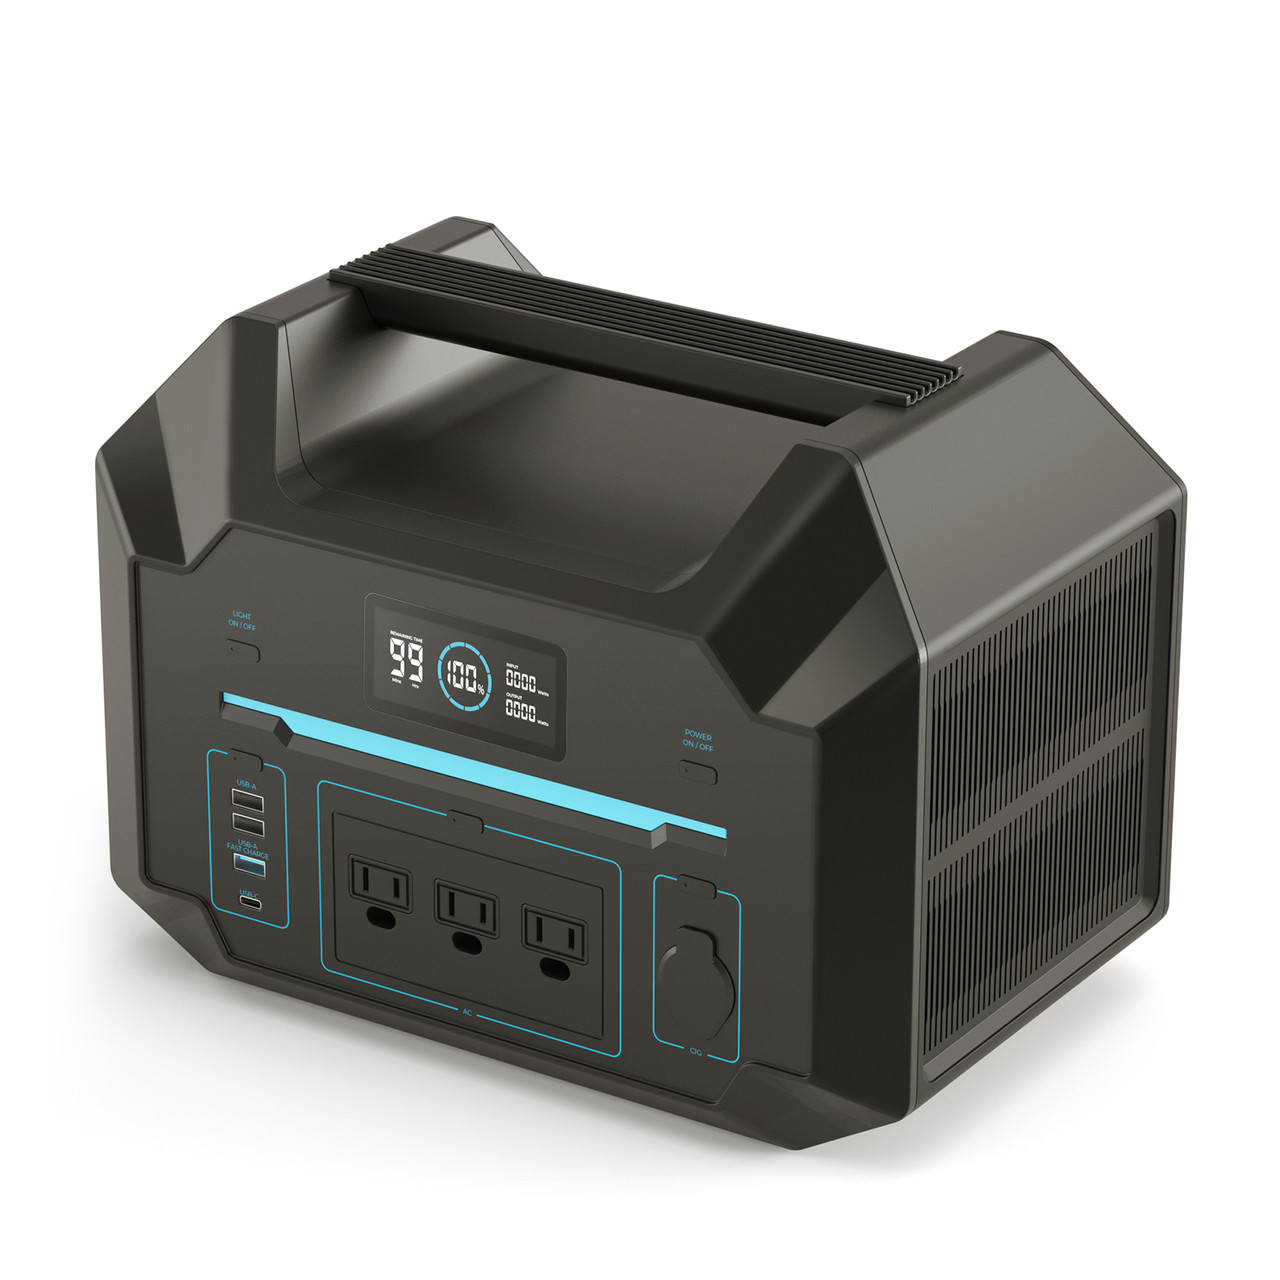
Renogy Small Power Station
Traditional Solar System
A traditional solar system is on the opposite end of the scale when it comes to complexity. This type of system has a much steeper learning curve and will require you to know a lot more to set it up. Each individual component is purchased separately, and they all need to be wired together. This will require you to understand appropriate cable sizes, fuse sizes, etc.
On the positive side, this type of system gives you the most control and flexibility. Each component can be easily upgraded or switched out in the event of a failure. If you decide you need more capacity, you will have a much deeper understanding of your system and likely have the confidence to change it as necessary.
Fully Integrated Solar System
Lastly, fully integrated systems are a newer approach to solar and are in the middle of the complexity scale. With these systems, the major components are all separate, but the way they connect is simplified. This still gives you the flexibility of being able to replace or upgrade parts, but you don’t have to have or learn as much to set them up. Components often just get plugged into each other.
There are a few companies that are developing these types of systems, but they are not all created equal. The first time I came across this type of system, I really liked the approach, but a big downside was that the company locked you into their products. If you needed to change anything, it had to be their brand. Later I discovered REGO, an integrated solar solution from Renogy. I had some experience with Renogy when we previously used their products in a traditional solar installation and was happy with the quality. REGO is like the other integrated solar systems, but the connectors are all standard, and thus allow you to easily replace components with any make and model that you choose. I’m not expecting that I will need to do that, but I really value the ability to do so. For this reason, in our sample system we will be using Renogy REGO components.
The downside to these systems is that they typically cost a little more than a traditional solar system. However, in my opinion, the benefit of an easy and reliable installation outweighs that slight increase in cost.
Understand the Components of a Solar System
Before you get started, you’ll want to familiarize yourself with all the different components that make up a solar power system. These components work together to generate, store, and distribute electricity.
Solar Panels
Solar panels are the most recognizable component of a solar system. They convert sunlight into direct current (DC) electricity using photovoltaic cells.
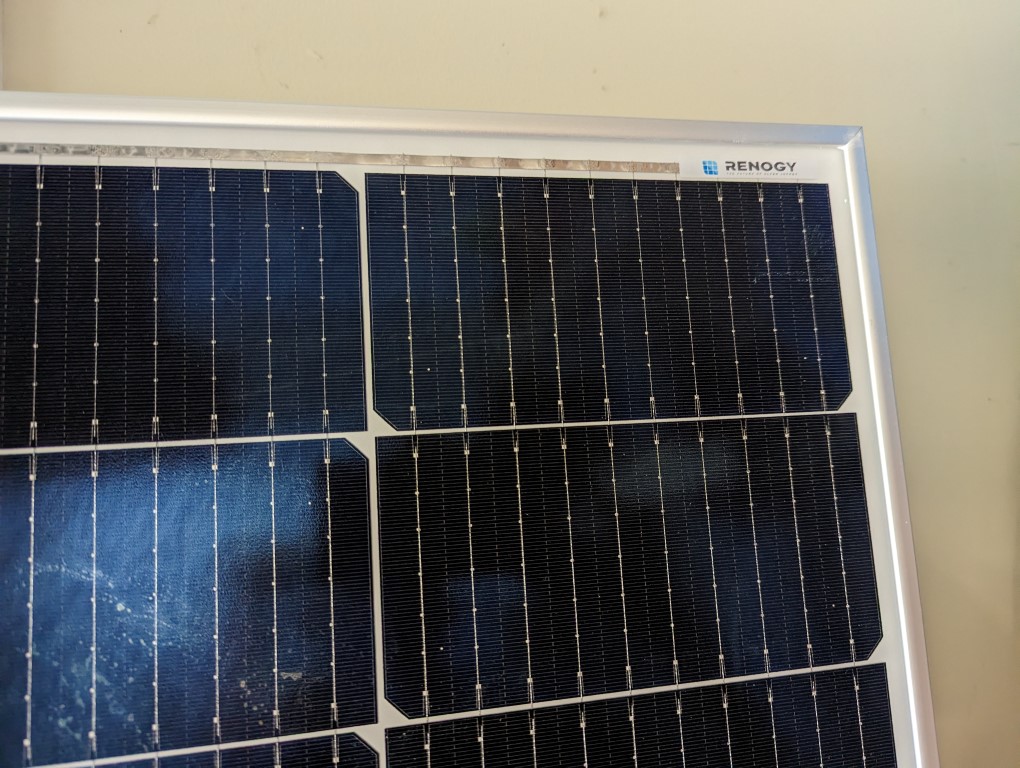
450W Renogy Solar Panel
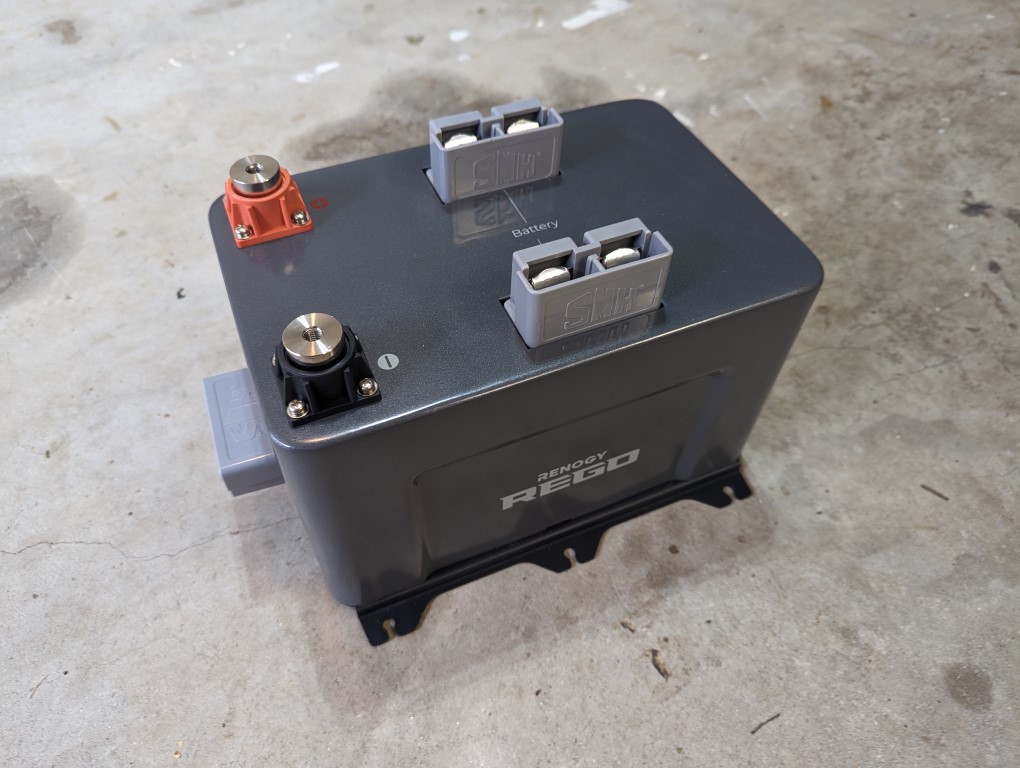
Batteries
Batteries are used to store electricity generated by the solar panels for use later. This allows solar-powered homes to continue running during times of low sunlight, such as at night or during cloudy days. Power stored in batteries is stored as DC power.
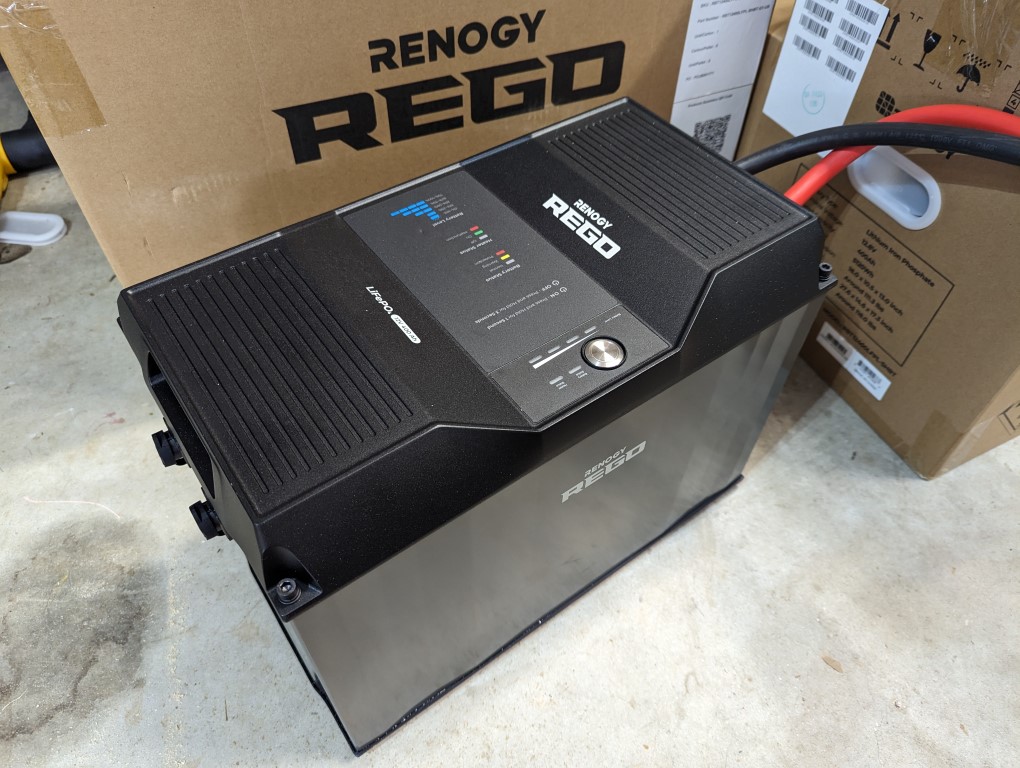
400Wh Renogy REGO Battery
Inverter
The inverter is responsible for converting DC electricity generated by the solar panels and stored in the batteries into alternating current (AC) electricity that can be used by household appliances. This is important because most appliances run on AC power because the power grid is AC power. But in a solar power system, power is stored in batteries as DC power. Thus, a conversion from DC to AC is required for most appliances.
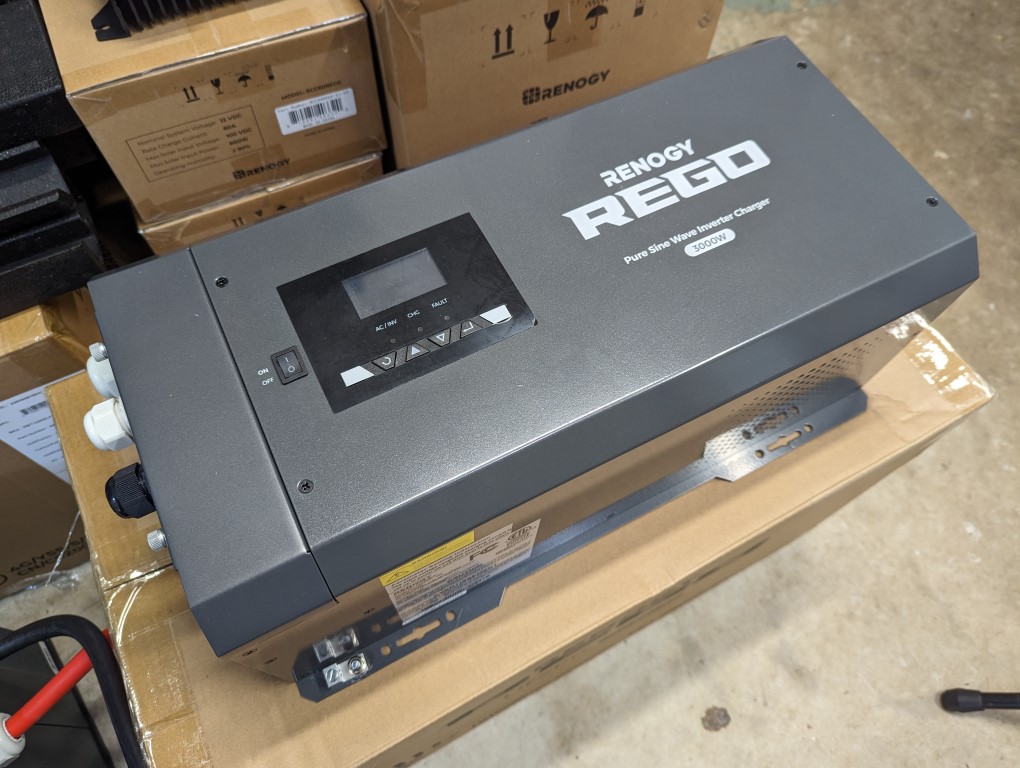
3000W Renogy REGO Inverter
Charge Controller
The charge controller regulates the amount of electricity flowing from the solar panels to the batteries, preventing overcharging of the batteries. This is essential to keeping your batteries healthy. Batteries are one of the most expensive parts of a solar power system, and so you want to take care not to damage them.
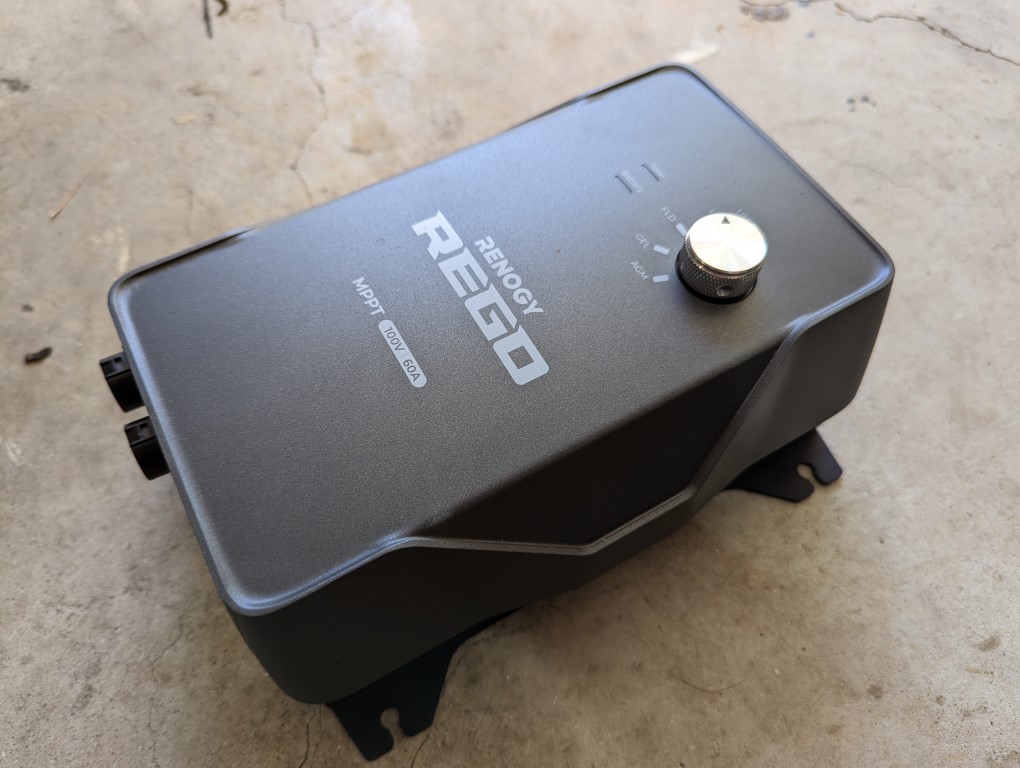
Renogy REGO MPPT Charge Controller
Monitoring System
The monitoring system tracks the energy generated by the solar panels, battery capacity, and energy usage in real-time, providing homeowners with data to optimize their energy usage and system performance. This can help you avoid running out of power by letting you know that you may need to reduce your usage and/or supplement the solar panels with a generator, portable solar panels, or some other source.
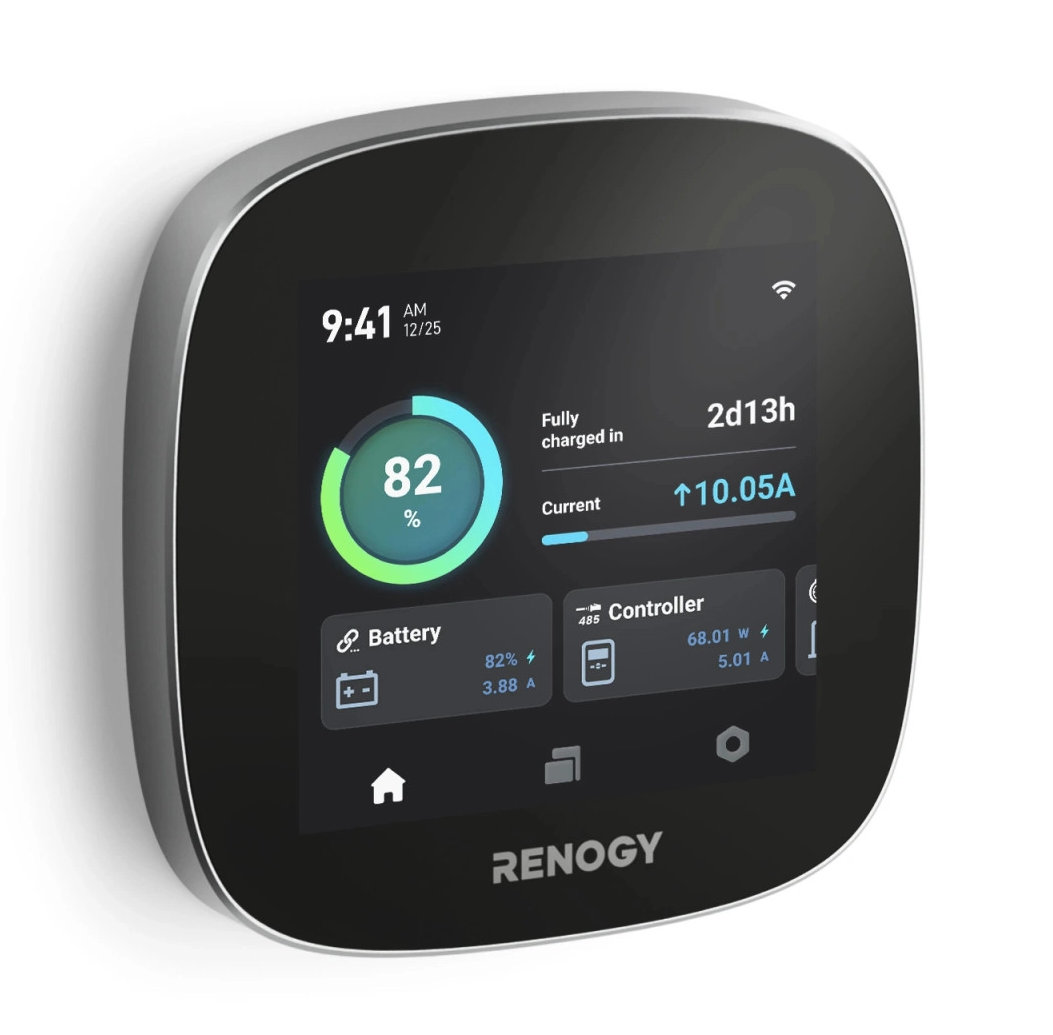
Renogy ONE Core Monitor
Miscellaneous Parts
There are other miscellaneous parts like wires and mounting brackets that you will need to complete your system.
Because I am using the REGO system, many of the extra pieces are combined into what they call combiner boxes. So instead of having a bunch of misc. cables, bus bars, and fuse holders, they are all packaged together into one product, simplifying installation.
3000W Renogy REGO Battery Combiner
Sizing Your Solar System
Now that you know what the primary components of a solar power system are, you will need to determine the appropriate size of each of them for your needs. This involves calculating the wattage and the quantity of solar panels, capacity and the quantity of batteries, and the wattage of your inverter. Don’t worry if you don’t know what some of those terms mean, we’ll go through each of them.
The size of your solar system is primarily influenced by two things, your planned energy consumption as well as how much sunlight you get at your location.
Calculating Planned Consumption
Calculating your planned energy consumption involves evaluating all the appliances you plan to use on a typical day, the power needs of those appliances, as well as the amount of time you plan to use them.
While technically you could determine your energy consumption by looking at your current electrical bill, it is likely that you will use less energy once you transition to solar. For instance, when you become responsible for collecting and storing all your energy needs, you might be less likely to accidentally leave any lights or your computer on when you leave for the day.
The units of measurement we are going to be working with when making this calculation are Watts (W) and Watt Hours (Wh). Appliance manufacturers typically list the power consumption of an appliance in Watts. This is the amount of power the appliance will consume if it is run for one hour. Watt Hours factors in the amount of time the appliance with run. For instance, if we have a 1000-Watt air conditioner that will run for 6 hours a day, we will need 6000 Watt Hours (Wh) of Energy to power it (1000W X 6h= 6000Wh).
Occasionally appliance manufacturers will list the power consumption in amps. Since our calculations are being done in Watts, a conversion will need to be made from amps to Watts. But don’t worry, this is an easy calculation. To go from Amps to Watts, you use the formula Amps x Volts = Watts. If you are talking about an AC appliance (like one you would find in a conventional home), the Volts is almost always 120V. So, if you had a 10-amp appliance, the Watts would be 10 Amps x 120 Volts = 1200 Watts.
Below is an example of the energy consumption of an individual or couple living in a tiny house located in a warmer climate (where an air conditioner is needed daily).
| Description | Watts | Used per Day | Watt Hours |
|---|---|---|---|
| AC Minisplit | 900W | 6 hours | 5400Wh |
| Fridge | 33W | 24 hours | 800Wh |
| Coffee maker | 900W | 15 minutes | 225Wh |
| Microwave | 1000W | 10 minutes | 167Wh |
| Toaster | 1000W | 5 minutes | 83Wh |
| Light bulbs (x8) | 10W each | 4 hours | 320Wh |
| Ceiling Fan (DC) | 30W | 4 hours | 120Wh |
| Laptop/phone | 60W | 4 hours | 240Wh |
| Total | 7355Wh |
A few things to note about the table above:
First, you’ll notice that there are no heating appliances listed, like a water heater, stove, or cooktop. When researching appliance energy consumption, you will find the appliances that create heat use the most energy. Thus, if you can choose propane for those few items, you can significantly reduce the size of the system you’ll need.
Second, the amount of energy needed will be different during different times of the year. For instance, in the summer when it is hotter, the air conditioner will be used more often than in the winter. When preparing an energy audit, it is safest to consider the time of the year you will use the most power to ensure you will have enough energy during that time. In other words, don’t calculate your average energy consumption over the year.
Calculating Peak Power
In addition to the total power we will use each day, we also need to calculate the peak wattage. This is done simply by looking at the table above and determining which appliances might all be running at the same time. This will impact the size of the inverter that will be needed. In our example, I am going to anticipate that in a worst-case scenario, it’s possible that most of the appliances could be running at the same time with a few exceptions. I don’t expect that the fan and ac would be on at the same time. Also, as the homeowner, I would make a conscious effort not to run the microwave, toaster, or coffee maker at the same time to reduce the load on the system. This would leave the following appliances possibly running at the same time:
| Desc | Watts |
|---|---|
| AC Minisplit | 900W |
| Fridge | 33W |
| Microwave | 1000W |
| Light bulbs (x8) | 10W each |
| Laptop/phone | 60W |
| Total Peak Watts | 2003W |
Now that we know how much and the peak power we will need each day, it’s time to start sizing the components.
Sizing the Solar Array
The location of your tiny house plays a big part in determining the size of your solar array. This is because different geographic locations get different amounts of sunlight. Even locations next to each other can get different amounts of sunlight based on natural elements like hills and trees.
To determine the size of your solar array you will need to know how many hours of peak sunlight you will get each day. This will be less in the wintertime, so if you want to ensure you have enough power throughout the year you may want to use the amount of daylight you will get during this time in your calculations.
For this example, I’m going to use my location which is Atlanta GA. According to NREL, this area gets about 4.5 to 5 peak sun hours per day. I would then take the total watt hours I plan to use each day (calculated previously at 7355Wh) and divide that by the time I have to collect.
7355Wh / 4.75 hours = 1548W needed to collect per hour
That means I will need to collect about 1548 Watts per peak hour from my panels.
The solar panels I selected are high efficiency 450 Watt Renogy solar panels. By dividing the total number of Watts I need to collect each hour by the size of the individual solar panels, I can determine the number of panels I need.
1548W / 450W (per panel) = 3.44 panels needed
Obviously, you can’t have a partial panel, so I am going to round up to 4. This also happened so be the maximum number of panels I can fit on my houses.
Sizing the Batteries
Battery capacity is listed in Amp Hours (Ah). Different battery types and brands have different capacities. The type of the battery also determines how much the battery can be discharged, referred to as depth of discharge. This can make a big difference in determining how much true capacity you have. For instance, a lead acid battery (like what you might find in a golf cart) can only be safely discharged down to 50%, while a lithium iron phosphate (LiFePO4) battery can be discharged down to 80% or 90%. In other words, if you had a 100Ah battery in lead acid, you could only use 50Ah of its capacity, while a LiFePO4 battery would give you 90Ah. For this reason (as well as others), most modern solar power systems are using LiFePO4 batteries.
For this system, I will be using Renogy REGO 400Ah 12V LiFePO4 batteries. Our system is going to be all 12V, however, you do have a choice of 12V, 24V, and 48V when you are talking about the DC side of a solar power system (remember, the AC side in a tiny house is always 120V). There are pros and cons to the different DC voltages available, the most notable pro for larger voltage systems (24V and 48V) being thinner, less expensive cables. But for a system the size we are building, and the close proximity of the components, 12V works well. To learn more about system voltages check out this article.
Now that I have selected a battery (based on the type, brand I trust, price), I need to determine the quantity I will need. Since battery capacity is calculated in Amp Hours (Ah), I’ll need to convert some of my numbers using the formula I mentioned earlier. Earlier we calculated that I planned to use 7355Wh each day, to convert Wh to Ah we need to use the formula:
(Wh/V=Ah) 7355Wh / 12V = 612Ah
This tells us I will need at least 612Ah of storage capacity. Given that the batteries we selected are rated at 400Ah, and because of their type we can use 80% of that (80% depth of discharge), each battery gives us 320Ah of usable energy. To calculate the number of batteries:
612Ah / 320Ah = 1.9 batteries
Again, we can’t have a partial battery so I would need to round up to 2.
I also want to plan for the fact that the sun doesn’t shine every day. On cloudy or stormy days I won’t be able to collect much power to replenish my batteries. For this reason I am going to add one more battery for backup storage capacity. This will ensure that I very likely won’t run out of power.
Sizing the Inverter
Next, we need to size the inverter. Inverters are sized in Watts, and not Watt Hours, because time is not a factor (the inverter can run indefinitely unlike a battery). To determine the size we simply look at our peak energy need calculated earlier to be 2003W.
When looking at what products are available, I selected the Renogy REGO 3000W Inverter Charger. 3000 Watts of capacity far exceeds my 2003W requirement, so it should be more than adequate (even if I forget and make some coffee while toasting my bagel).
One other thing about the inverter I selected is that it is an inverter charger. This extra ‘charger’ feature can be very useful if you plan to have access to shore power. Shore power is basically just temporary grid power typically provided at a campsite or in the case of a boat, at a dock. For example, an RV can occasionally be off the grid, where it can use a solar power system for its power needs. But then it can also be on the grid at a campsite where power is provided.
With an inverter charger, when shore power is available, it will bypass some of your solar system as well as charge up your batteries. Even If you never plan to be near shore power in your tiny house, this extra functionality can be helpful by making it easy to charge your batteries from a generator if needed.
Sizing the charge controller
Lastly, you may need to size your charge controller. The charge controller takes power from the solar panels and dumps it into the batteries. When you have more panels, your charge controller needs to be large enough to handle the power they produce. In our system we are using the Renogy REGO charge controllers. These charge controllers only allow a maximum of 2 panels each, so the system is sized by adding more charge controllers instead of getting a larger controller. This takes the guesswork out of sizing them. In our case, we have 4 panels, so we will be using two charge controllers.
Designing the Solar System
Now that we have all the components selected, and we know the quantity of each of them, the system design is mostly done for us. This goes back to the simplicity of the REGO system. All the parts just plug together.
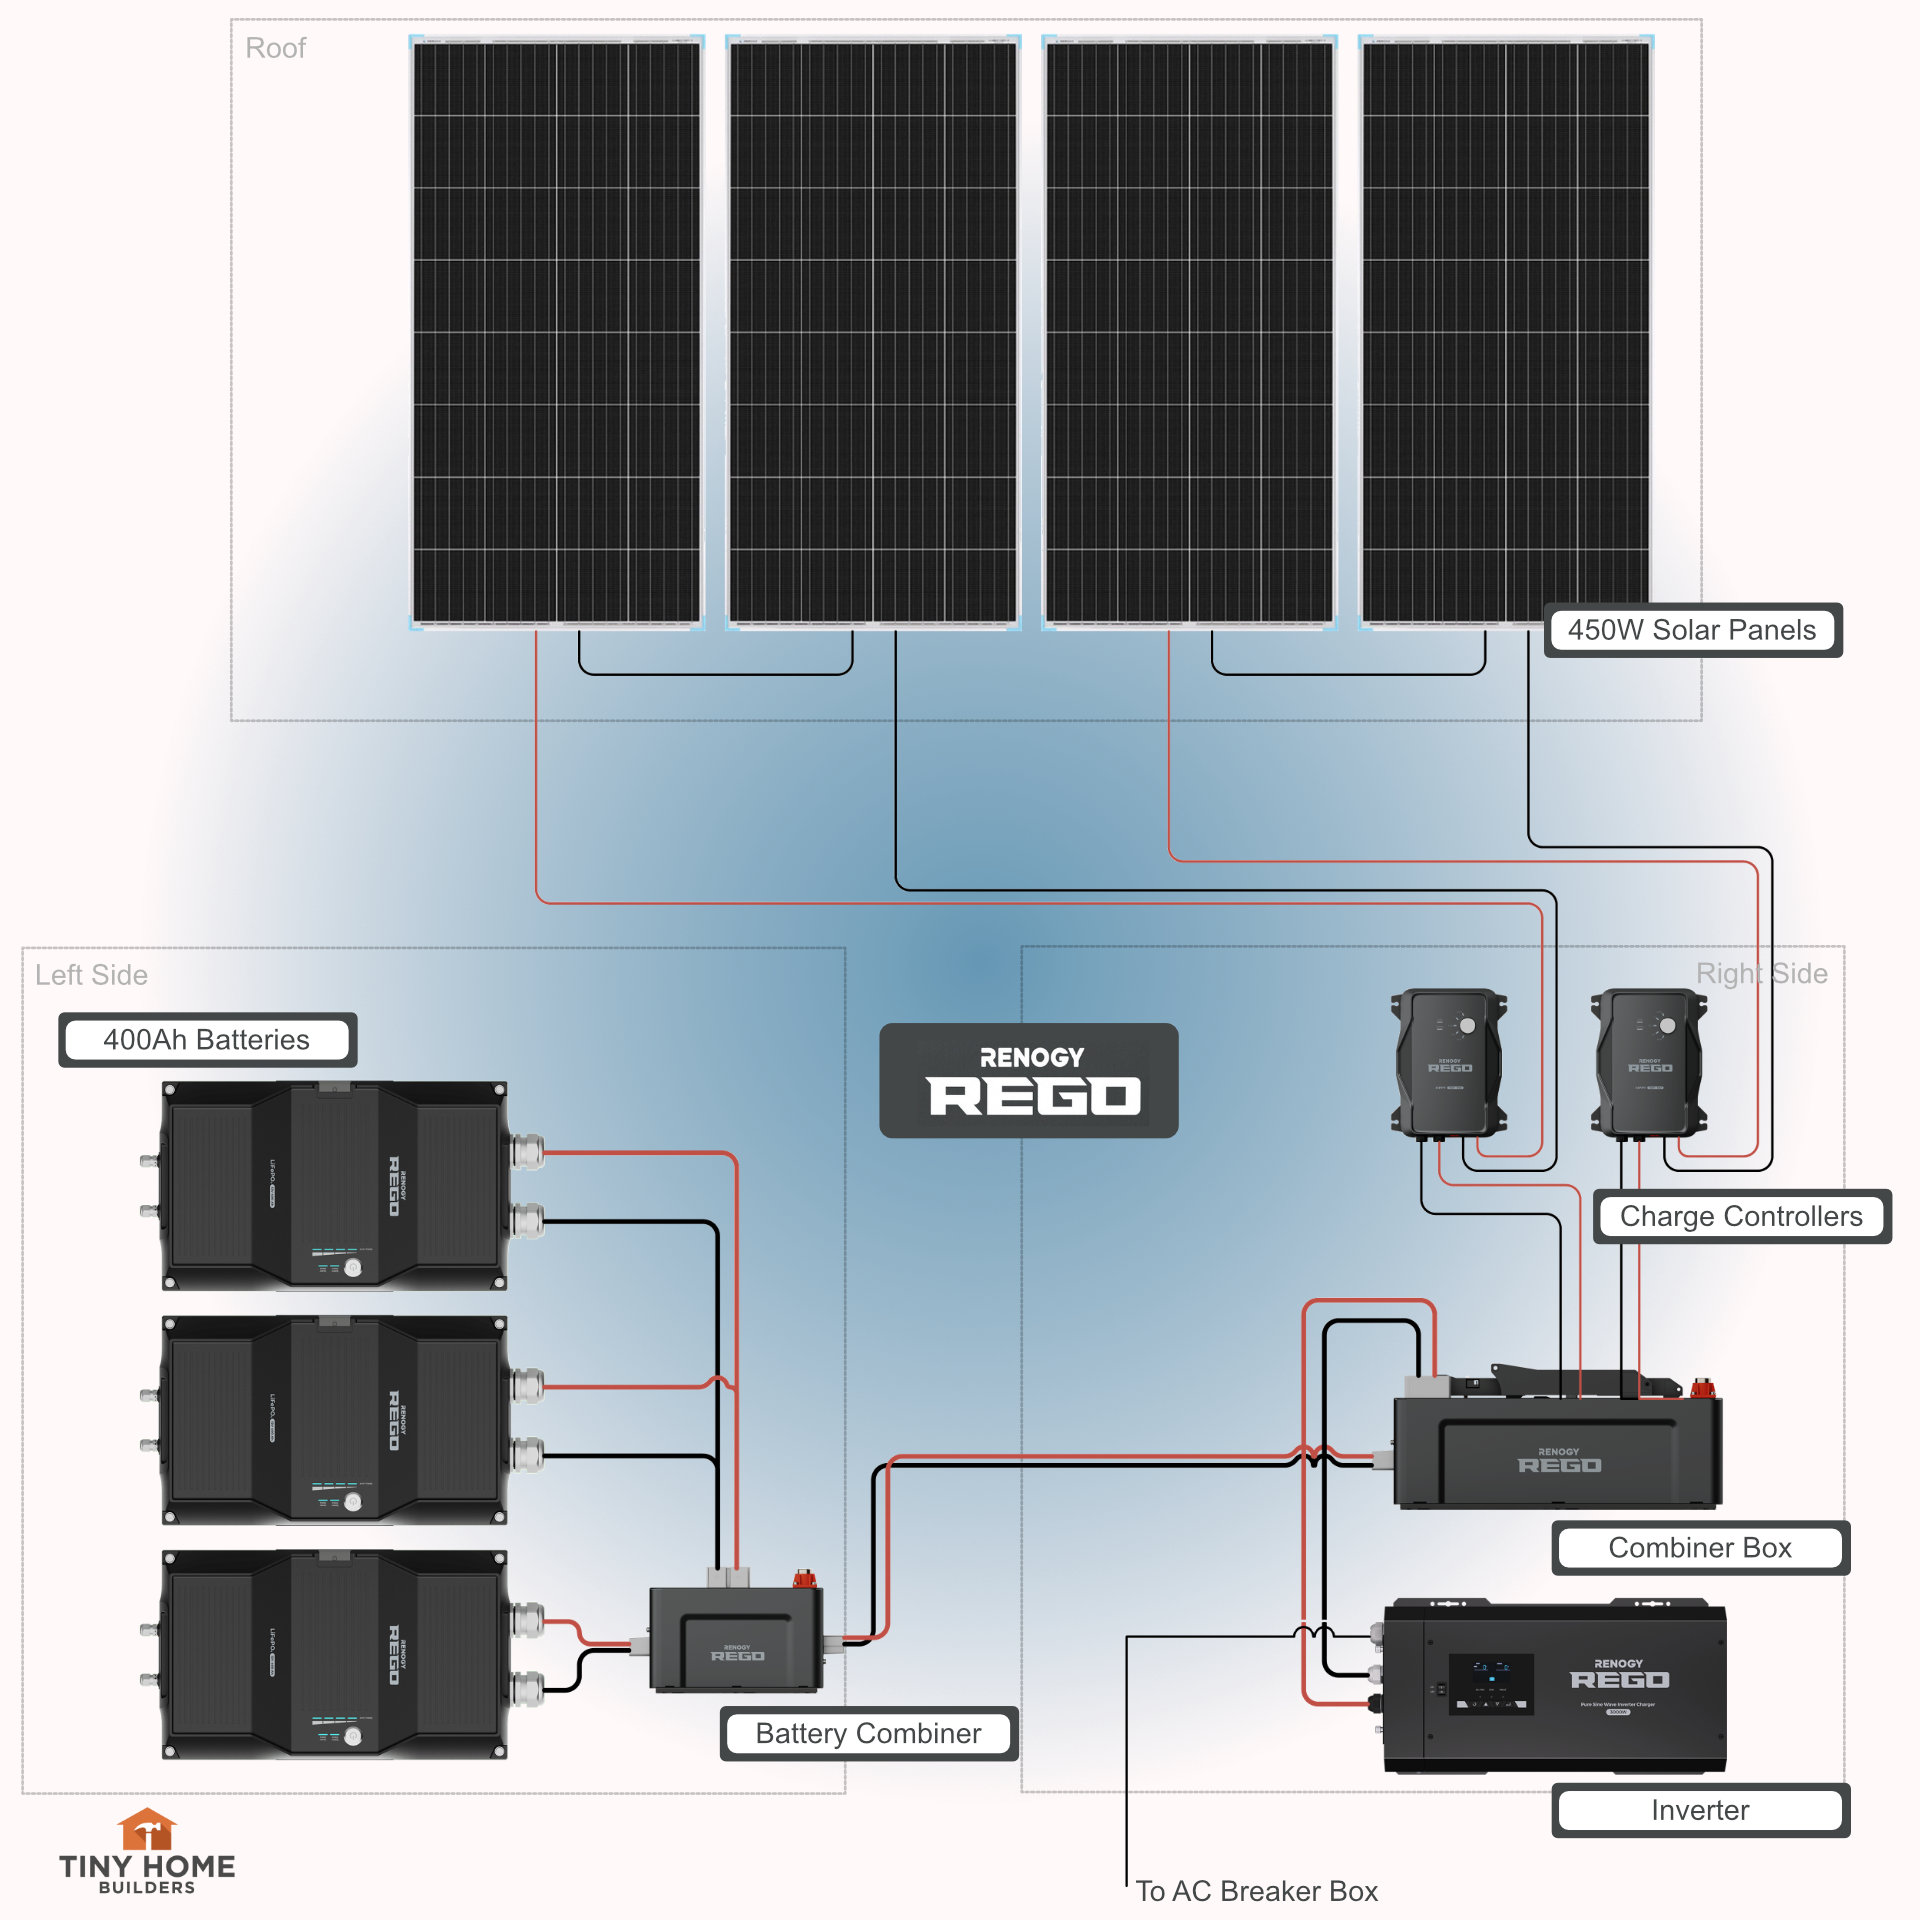
Tiny House Solar Power System Diagram
Note: If you aren’t using the REGO system, the design won’t be much different. Primarily, the REGO combiner boxes will be replaced by the individual fuses, wires, and terminals that they contain. I’m not going to draw them out here, but there are a lot of sample diagrams online that you can find that will help you with how that is done. The important part will be to use the equipment sizes that we have already determined.
In the diagram you can see that I’ve designed the system to be divided between the right and left sides of the house. This was done to distribute the weight of the system across the house. Because this is a somewhat larger system, the components are quite heavy (the batteries alone are 112 lbs. each).
Parts List
From the diagram we can build a parts list that includes not only the components, but also the individual wires. Since our system is designed to be divided between the two sides of the house, there is a custom wire that needs to be created. I could do that myself, but by the time I order the different parts it isn’t that much to have it custom made. However, I’ll wait until the system is installed before I order it so that I can insure the length is correct.
| Product | SKU | Quantity | List Price | Discount Price* | Subtotal |
|---|---|---|---|---|---|
| Renogy Solar Panels - 450 Watt - 2 Panels (4 total) | RSP450D-120x2-US | 2 | $899.99 | $692.99 | $1385.98 |
| Renogy REGO Charge Controller | RCC60REGO-US | 2 | $399.99 | $323.99 | $647.98 |
| Renogy REGO 400Ah Battery | RBB12400LFPL-0140SR-US | 3 | $3,499.99 | $2699.99 | $8099.97 |
| Renogy REGO 3000W Inverter Charger | RIV1230RCL-1SS-US | 1 | $1,059.99 | $953.99 | $953.99 |
| Renogy REGO Combiner Box | REC400RSCB-4P-US | 1 | $549.99 | $445.49 | $445.49 |
| Renogy REGO Battery Combiner Box | REC400RBCB-3P-US | 1 | $349.99 | $269.99 | $269.99 |
Renogy REGO System Accessories Bundle
|
RBD12REGO-US | 1 | $339.99 | $305.99 | $305.99 |
| Cable - Solar Panel to Charge Controller - 20ft 10AWG | RNG-EXTCB-20FT-10-US | 6 | $34.99 | $31.49 | $188.94 |
| Cable - Battery Combiner to Combiner | Custom | 1 | $340.00 | $340.00 | $340.00 |
| Total | $12,638.33 |
* The discount price was obtained by using a combination of the standard discount offered by Renogy at the time this article was published, as well as an additional 10% discount provided to Tiny Home Builders and its readers using coupon code ‘THBD10’.
Installing a Tiny House Solar System
We plan to build our solar house this summer, so we will be adding details here when we do.