In this guide we’ll discuss how to attach your tiny house to your trailer. There are different ways that this can be done, with each method having its own pros and cons. The 3 predominant methods are:
- Adding a metal layer of protection on top of the trailer and then adding a subfloor.
- Adding a subfloor on the trailer and then adding a corrugated plastic layer to the bottom of the trailer.
- Skip the subfloor framing and add the subfloor sheathing directly on the trailer.
While these methods are all different, there is also a lot of overlap between them. For this reason, we will explain the first method in the most detail, and then explain how the others differ.
Method 1: Adding a metal layer of protection on top of the trailer and then adding a subfloor.
This is the method we recommend if you are using an insulation in your floor other than closed cell spray foam (e.g. wool, denim, xps, etc).
With this approach, you will cover the entire trailer in a metal sheet material prior to attaching a 2x4 subfloor on top of the trailer. This metal will serve to not only protect the underside of your house and the insulation, but it will also function to hold any loose insulation materials like denim or wool in place.
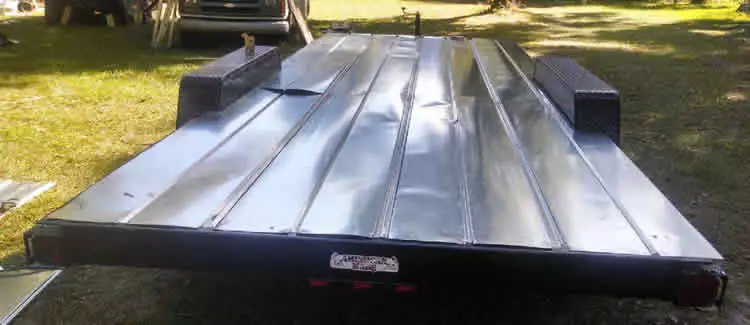
The material we typically use for this is an inexpensive metal roofing called ‘5V crimp’. The roofing material is turned upside down so that the raised portions are facing down and don’t interfere with the subfloor. It is then temporarily secured in place with metal screws. Later, when the subfloor is installed, it will be sandwiched between the metal frame of the trailer and the wood subfloor, thus securing it permanently.
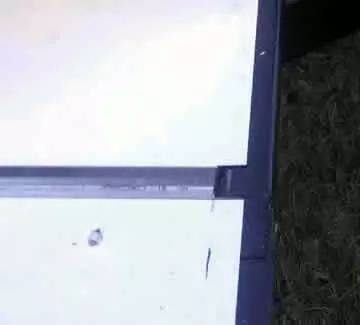
The 2x4 subfloor is then constructed in three parts, one behind the fenders, one between the fenders, and one in front of the fenders. Once in place, these sections are fastened together and then bolted to the trailer.
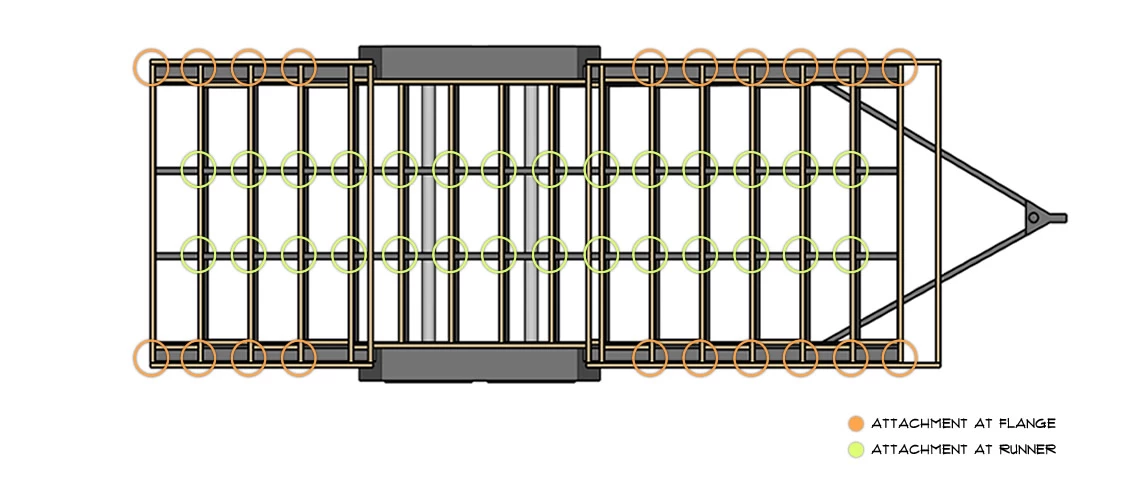
Our tiny house trailers include a steel flange along the side edges as well as two steel ‘runner’ beams running down the length of the trailer near the center. Each subfloor joist is bolted to these flanges and runner beams where possible, to secure the wood subfloor to the steal trailer. However, not every potential connection point can, or needs to be used on every joist. For instance, on some joists the angle of the fender may not allow enough room for the tools needed, or rear lights mounted close to the flange may make a connection point unavailable. We will typically place a bolt at every possible location along the outer edge, and then stagger the bolts on the interior of the joists.
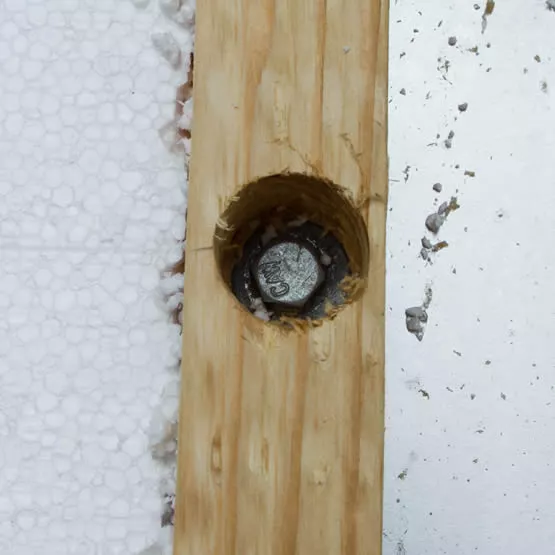
At each attachment point, we start by drilling a 1” wide hole just deep enough to countersink the washer and head of the galvanized hex bolts we’ll be using later. Next, using a 3/8” drill bit suitable for both wood and steel, we drill a hole down through the floor joist and through the metal piece below (either the flange or runner beam). Finally, we secure the joist and trailer together using a 3/8” hex head bolt with an added washer at the head of the bolt, and at the bottom of the bolt a washer, split washer, and nut. The length of the bolts that go through the runner beams will need to be at least 6-1/2” long, while the bolts that go through the flange will need to be at least 5” long.
People are often concerned about the perceived difficulty of drilling through the metal of a trailer, but as I demonstrate in the “Ask Dan” episode below, it’s not difficult at all.
Next, insulation is added within the subfloor framing and sheathing is attached to the top to seal it all together. With the subfloor fully complete, walls can then be built on top.
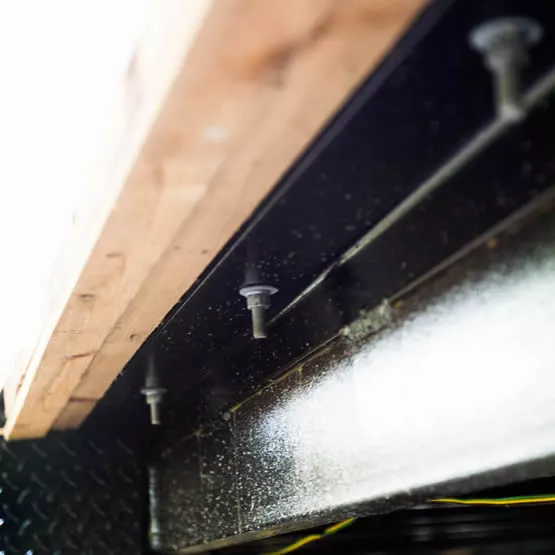
The final step once the walls are attached is to add tension ties to further secure the walls to the metal trailer. These tension ties are added in 8 locations: one at each corner of the trailer, and one at each end of the fenders. The tension ties are attached to the side of a stud, and then a bolt passes down through the kick plate of the wall, subfloor, and metal portion of the trailer, securing it all together.
Method 2: Adding a subfloor on the trailer and then adding a corrugated plastic layer to the bottom of the trailer.
This is the method we recommend if you are using closed cell spray foam as your insulation. This is the insulation type we use on most of our homes, thus this is the method we use most often.
This approach is almost identical to method 1, however, the metal sheeting (5V crimp roofing) material is omitted, and instead corrugated plastic (plasticore) is added to the underside of the trailer at a much later time. This is only possible if the insulation you are using is closed cell spray foam, which is sprayed on from below and adheres to the underside without the need for support.
There are several benefits to this approach. These include not having to cut through the metal underside flashing to run your plumbing drain lines. When drain lines are dropped through the floor, they need to pass through all the materials that are installed. The metal sheet is typically not very thin and requires a grinder to cut a hole in it. This process can be difficult and unpleasant. Also, by adding the insulation after the plumbing is installed, it provides a better seal as the closed cell spray foam has a chance to expand and close any gaps. Finally, the plasticore is lighter and easier to work with than metal. It is attached to the underside of the trailer with self-tapping screws and large washers which can be easily removed for maintenance.
Method 3: Skip the subfloor framing and add the subfloor sheathing directly on the trailer.
We typically do not recommend this method.
This approach omits the subfloor framing all together and instead you attach the sheathing directly to the trailer itself. Like method 2, this approach requires the use of closed cell spray foam as there will be no support for the insulation.
The motivation for this method is that when the subfloor is eliminated, that removes 3.5 inches from the height of the floor, thus allowing for additional interior room within the home (since a tiny house is restricted to a total height of 13.5 feet). While this is a very compelling benefit, it comes with some serious downsides.
When a subfloor is constructed, it provides a place to install insulation that extends the entire width of the home. We call this a consistent thermal envelope. When this section is removed, the insulation must be placed within the metal framing of the trailer instead of the wood subfloor framing. This presents a problem as with most trailer designs the cavity in the trailer may not run the entire width of the home.
This approach also requires that the sheathing come in direct contact with the hollow metal structural beams of the trailer. Metal is a terrible insulator and can act as a thermal bridge for outside temperatures to enter your home. This not only requires you to use more energy with your HVAC system to compensate, but more importantly can result in mold as condensation can develop at and around these contact points.
For these reasons, in most cases we do not recommend this approach.